Owner Account Activities
Credentials For Demo
For Owner Panel: Email owner@gmail.com, password 123456.
Owner Dashboard
The dashboard is an analysis overview of the entire Zaiproty system and its components. It contains various information, modules and other information related to the information.

The top row of the dashboard panel has four feature items: total Property, total Units, total Tenants and total maintainers.

Total Property: Display the total number of properties of this owner.
Total Units: Display the total number of units of this owner.
Total Tenants: Display the total tenant number of this owner.
Total Maintainers: Display the total maintainer number of this owner.
In the second row there has a chart where the rent overview (amount) shows the parameter. This will give a general overview of every month.

The third row has two panels. The one is My Properties and the other is the Tickets list.

My properties: Owner can view the property list from this table. This table shows property name, units, available unit, tenant, maintainer. Clicking the view all button will open the property page.
Ticket: Owner can view ticket list from this table. Clicking the view all button will open the ticket page.
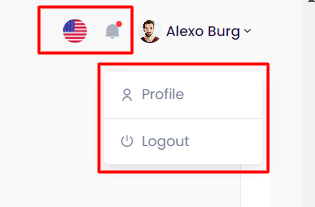
On the upper right side of the header menu there is a drop-down menu of Owner. Clicking this menu will show profile and logout options. Owner can also change language and get notification.
Properties
There are three sub menus in properties. All Property, Own Property, Lease Property.
All Property
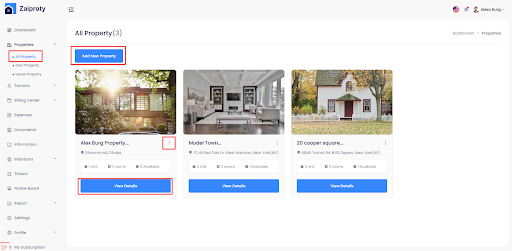
Owner can create property. In the property list the owner can view the details clicking view details. The edit and delete option are in the three-dot button.
Add Property
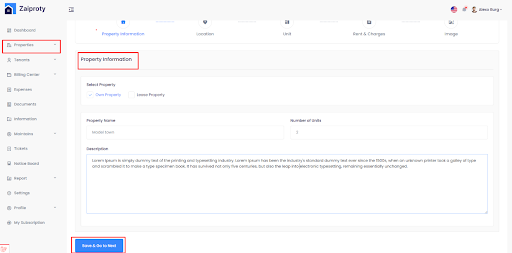
Owner has to pass five steps to create a property. They are property information, location, unit, rent & charge and image.
Property Information
Firstly, the owner has to select the type of property and then fill in the property name, number of units and description. Click Save & Go to Next button for the next step.
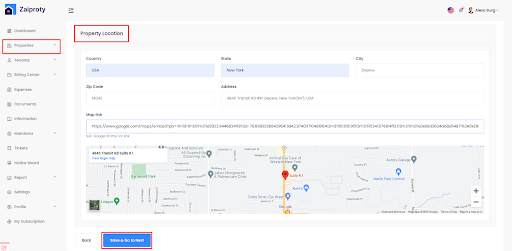
Property location
Specify the country, state, city, zip code. Address, and map link of the location.
Click Save & Go to Next button.
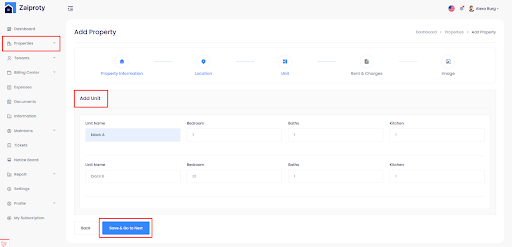
Add Unit
Specify unit name, number of bedrooms, kitchen, baths and click Save & Go to Next button.
Rent & Charges
Then this section. Specify general rent, security deposit, late fee, incident receipt and select rent type. When you select a rent type a due day field appears.
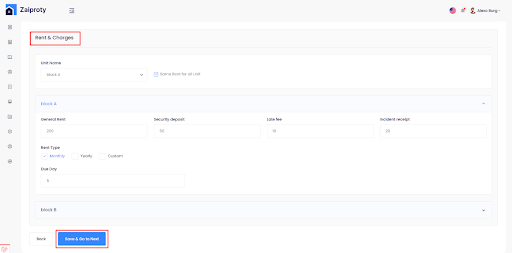
If you want to put the same charge for all units then put a value in one unit and then select a unit name and select the check marked option named same rent for all units.
Image
Add property image and document. Click the done button.
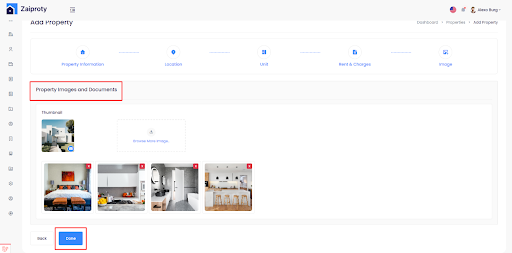
Your property is created.
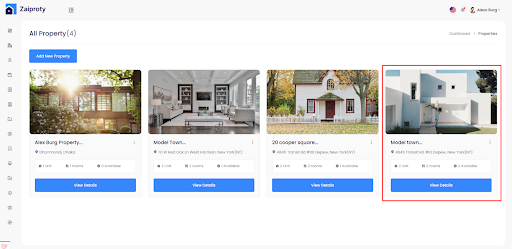
Follow the same process for own property and lease property.
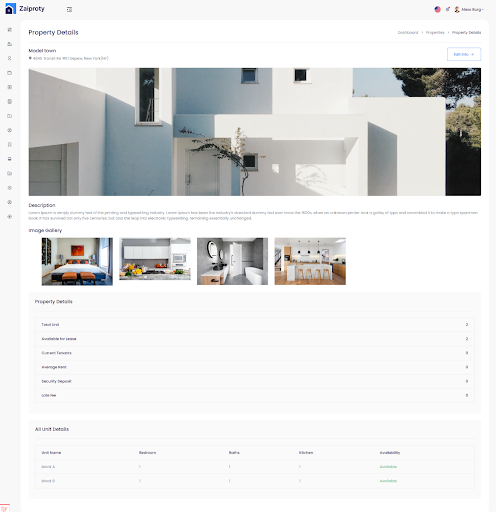
The view page of a property
Tenant
Add Tenant
Owner can manage all tenants from this tenant section. This page contains a search option, tenant list and the button of Add tenant. Owner can also edit and view the history of the tenant.
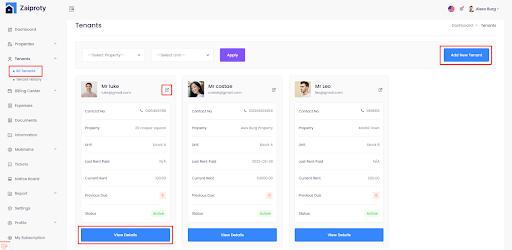
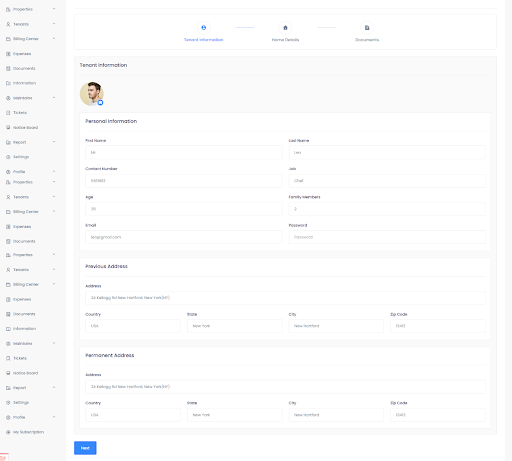
For creating a tenant, the owner has to complete three steps. First give the personal information and go next.
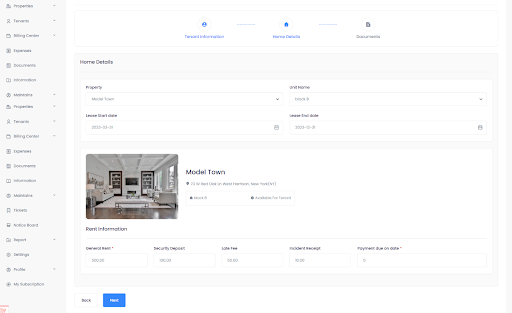
Second, select the property and rent information is shown according to the property you select. Click the next button.
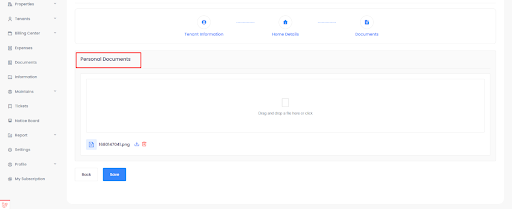
And last, give the documentation. (Only image)
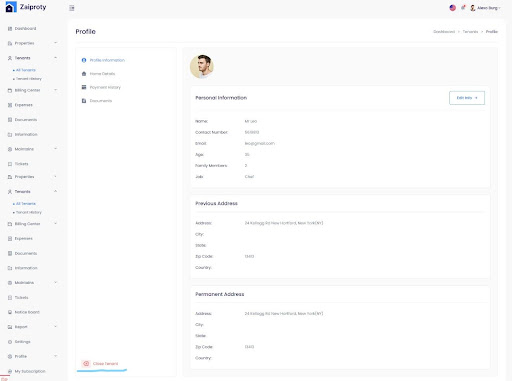
In the view details of a tenant, the owner can close a tenant.
Tenants History
Owner can see all the detailed information from this section.
Billing Center
All Invoices
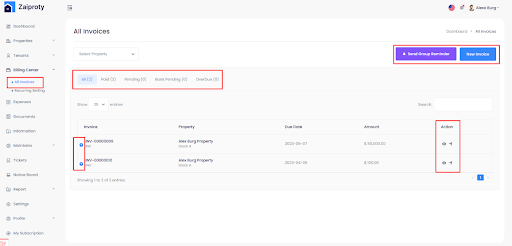
Owner can create an invoice by clicking New Invoice and also can download invoices in PDF and Excel file. Owner can send a group reminder of all his tenant by clicking Send Group Reminder button.
Recurring Invoices
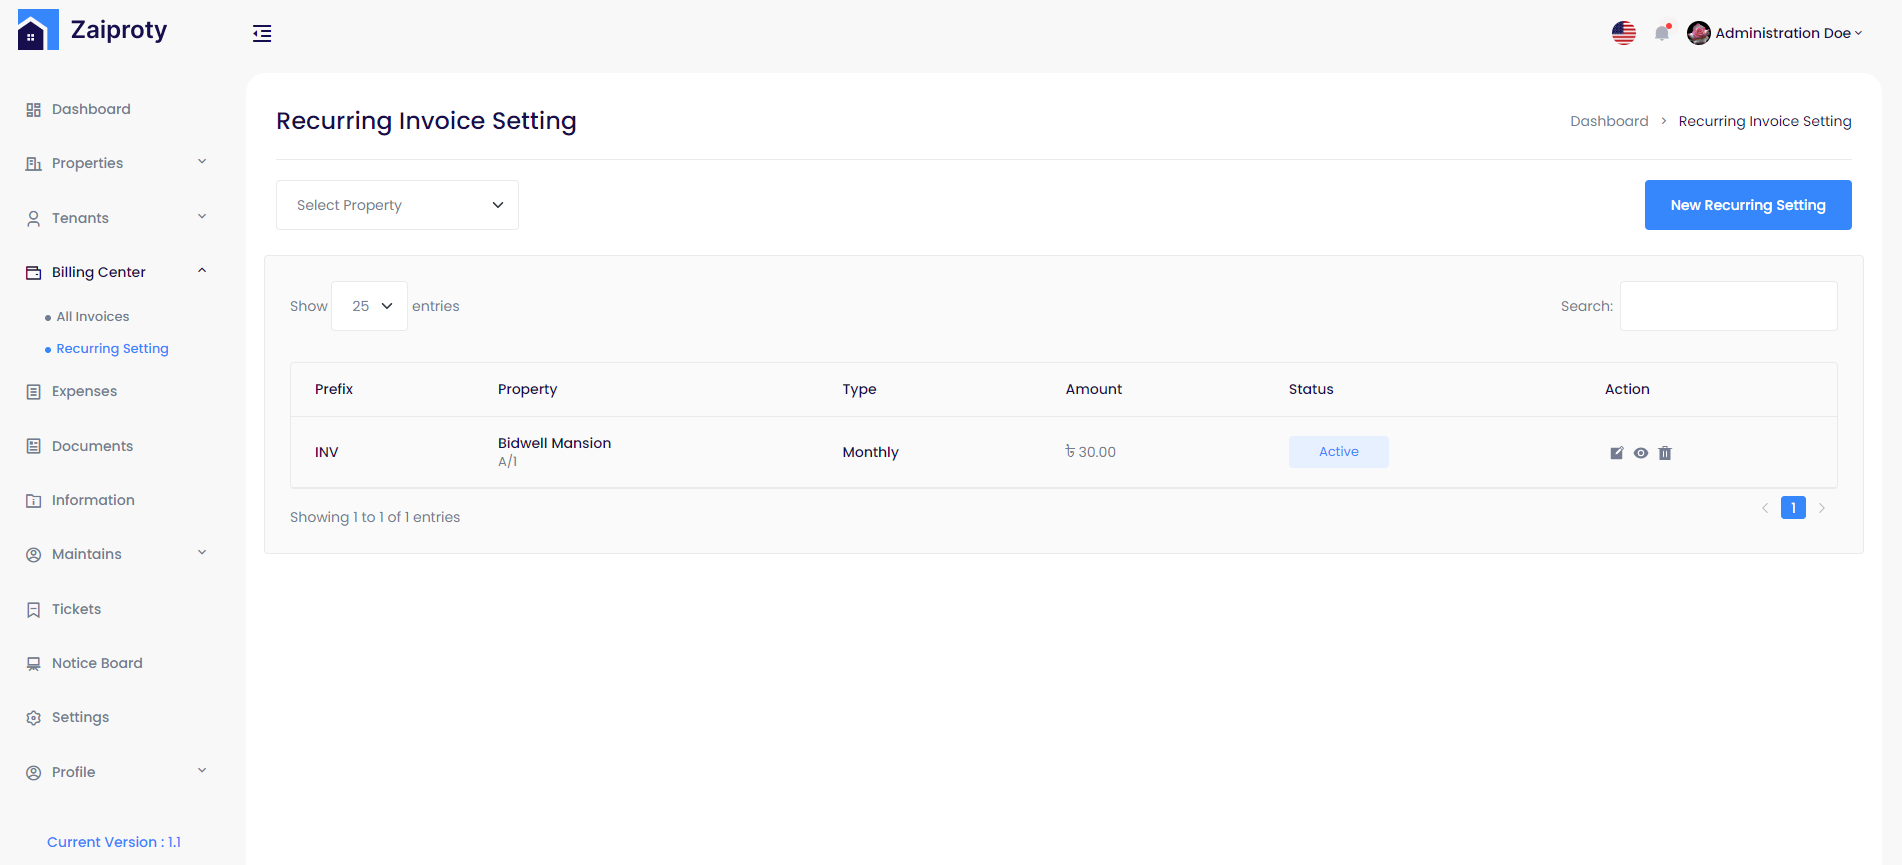
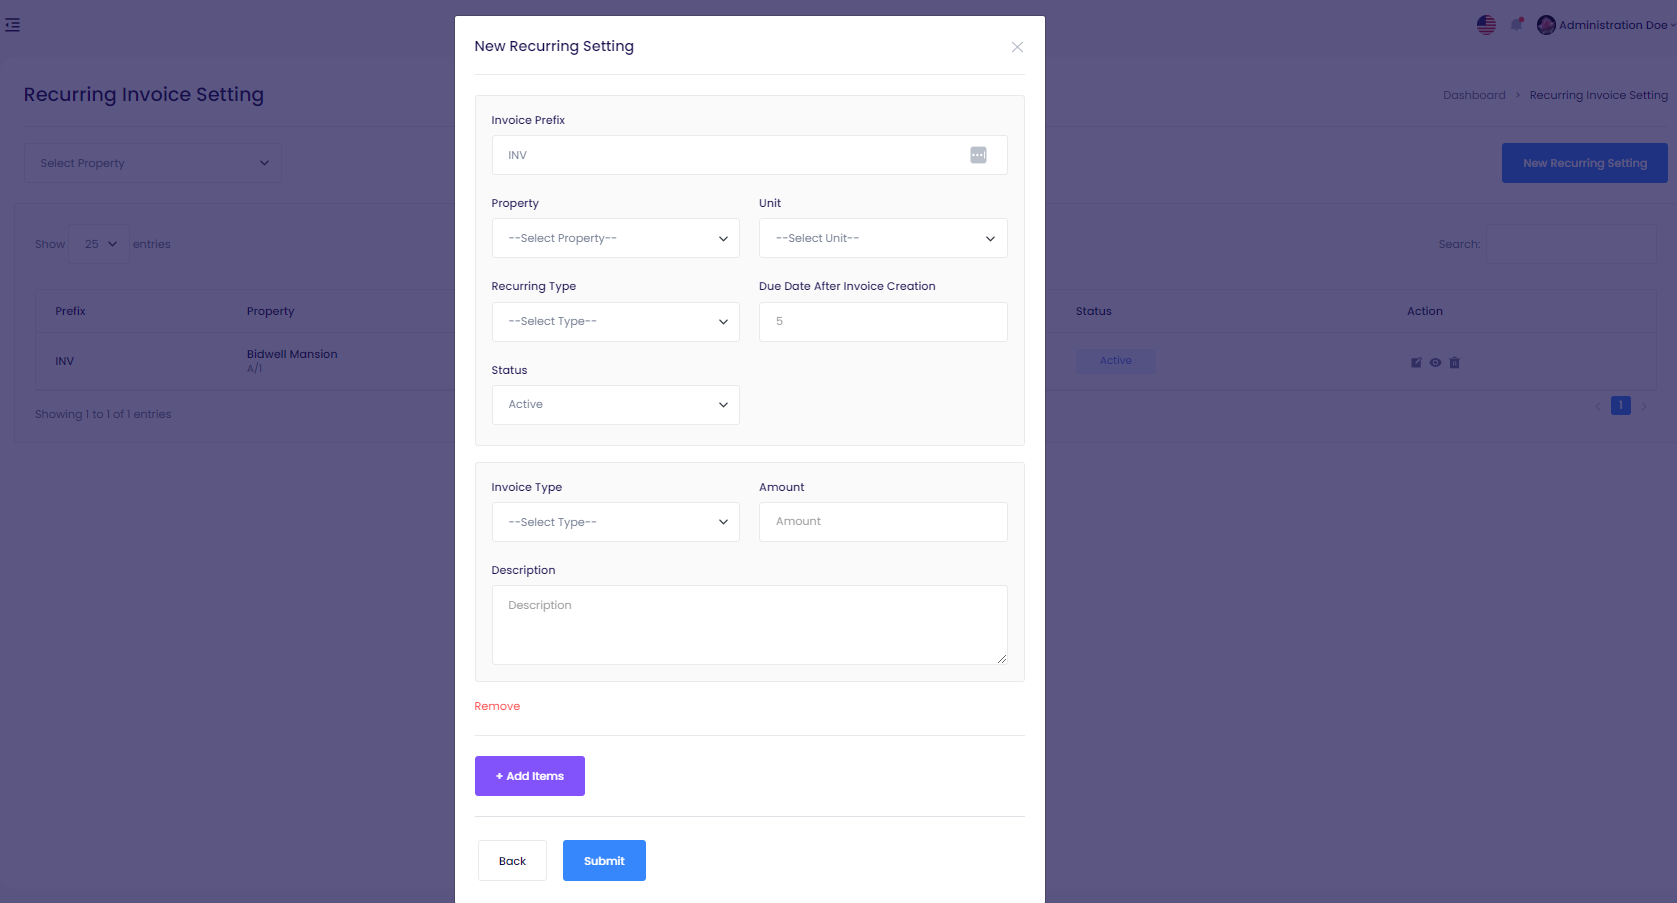
Owner can setup recurring invoice setting with monthly, yearly and custom. This invoice will automatically generated on that day by using cron.
All the recurring invoice list
Recurring setting add form
Expenses
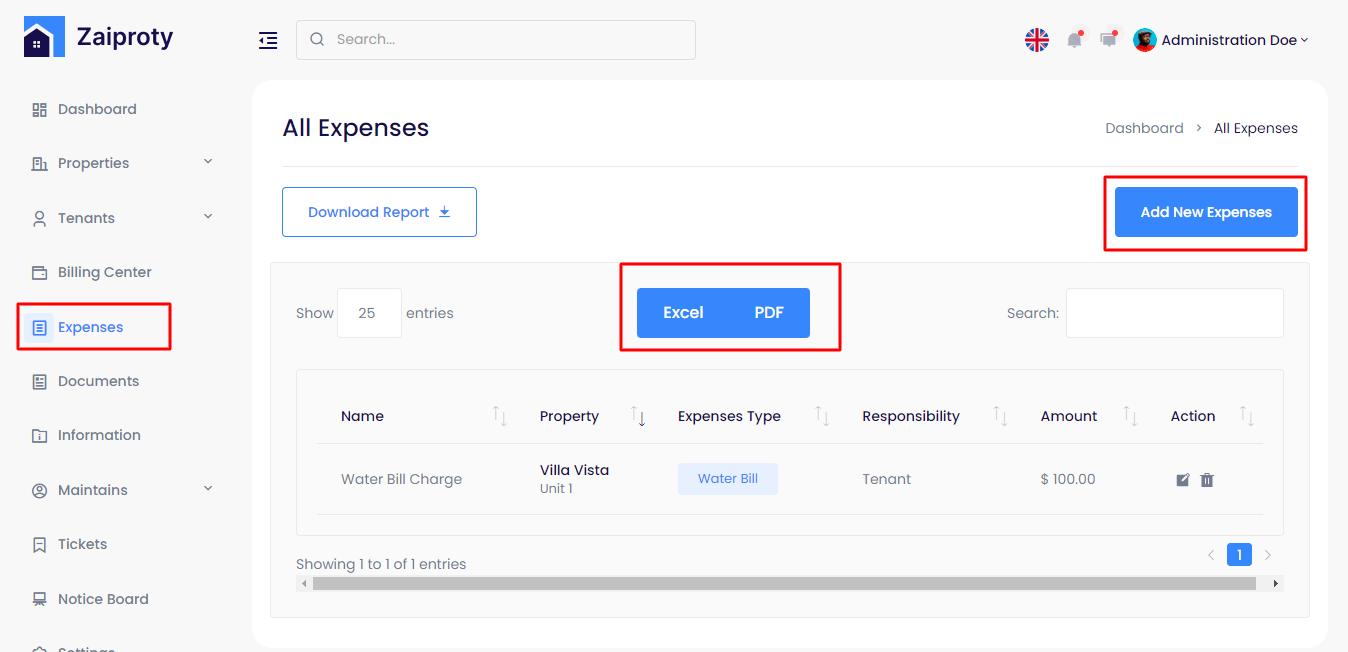
Owner can add different expenses from Expenses section.
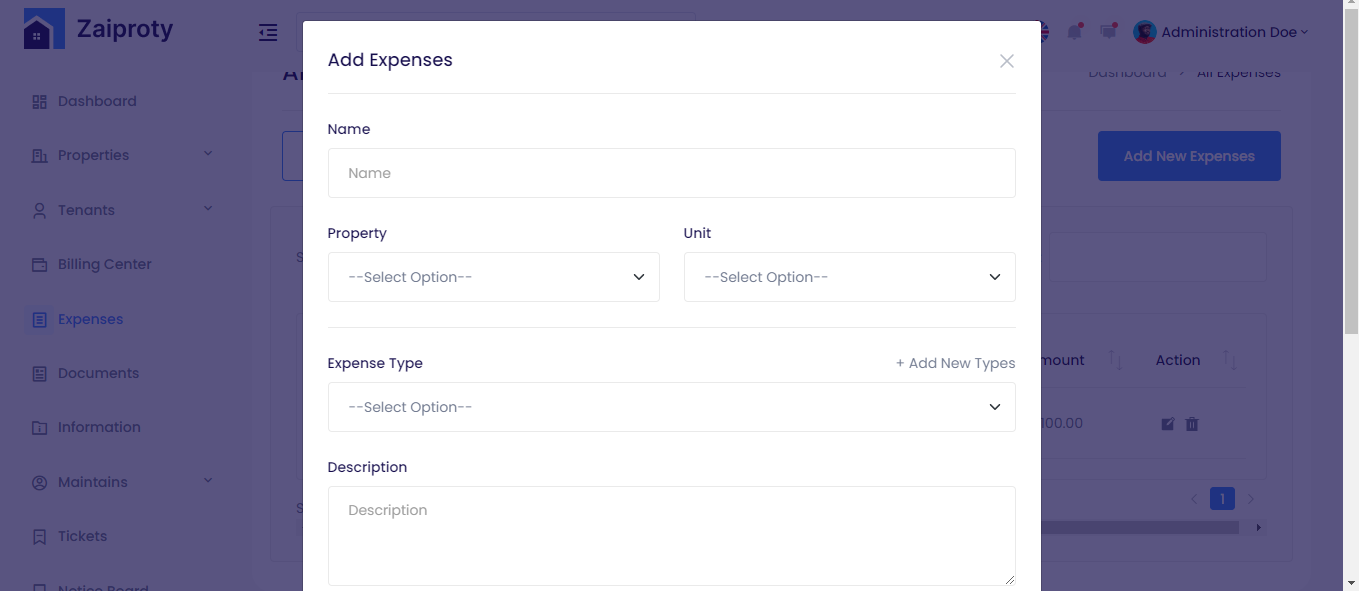
Click on Add New Expenses button and a modal will be opened.
When he will click on Add New Expenses button a modal will be opened .
Documents
Owner can see the documents uploaded by Tenants.

Information
The owner can add information related to their property, such as the location of a nearby school.

Maintainer
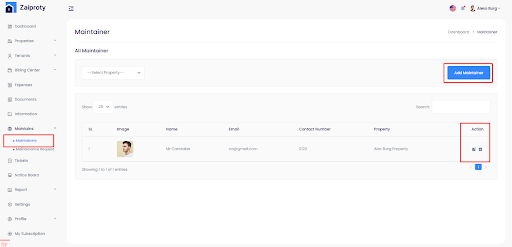
Owner Can add maintainer by clicking on Add Maintainer button.
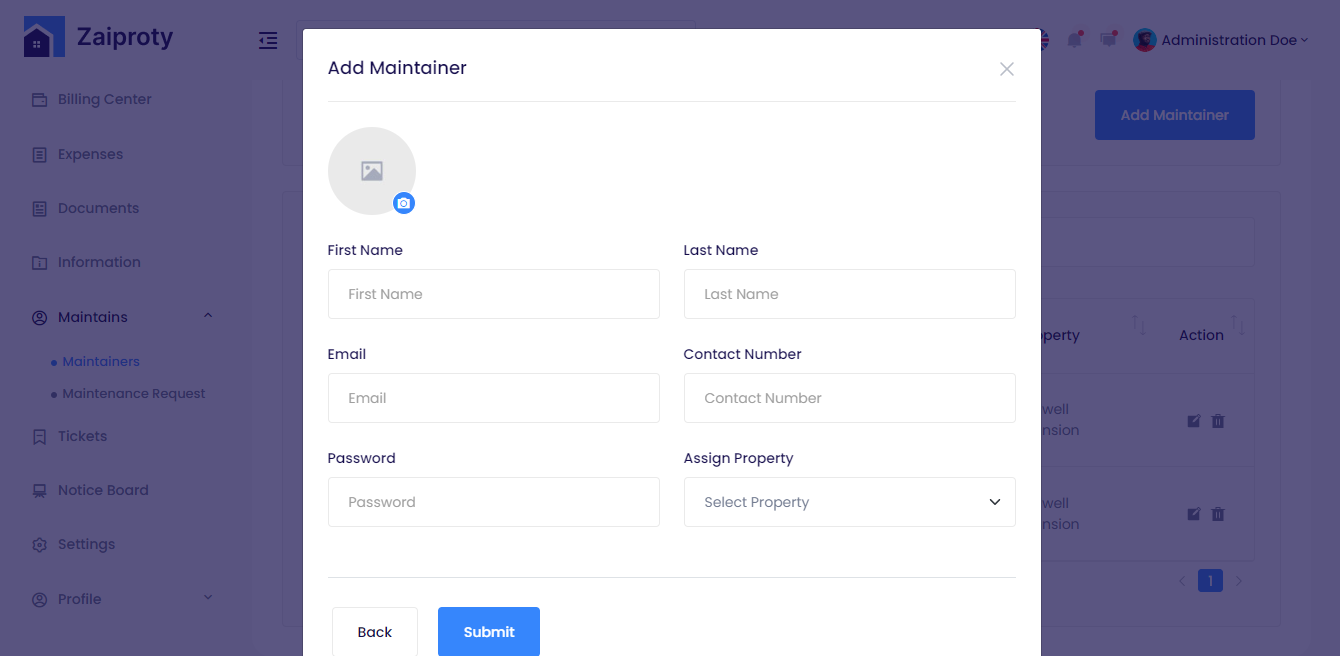
When Owner will click on Add Maintainer button the following modal will be opened.
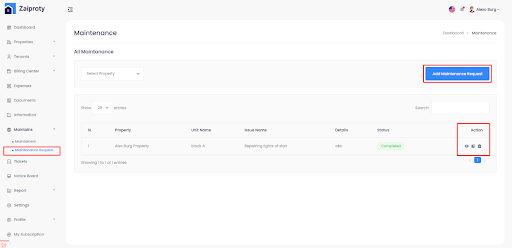
Maintenance Request
Owner can send maintenance request to the Maintainer.
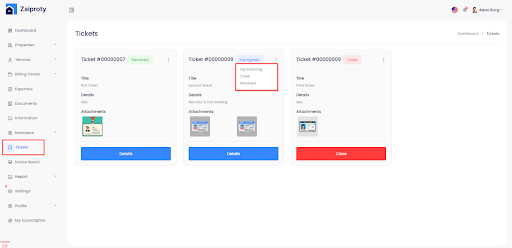
Ticket
Owner can see the tickets list created by the tenants and also can change the status of the tickets.
Notice Board
Owner can create notice for all tenants and also can edit, delete or see the notice
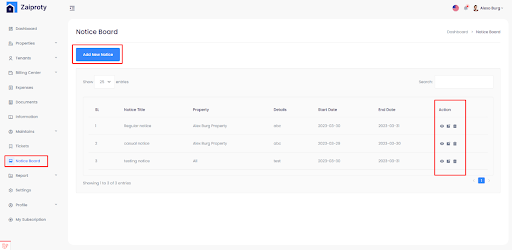
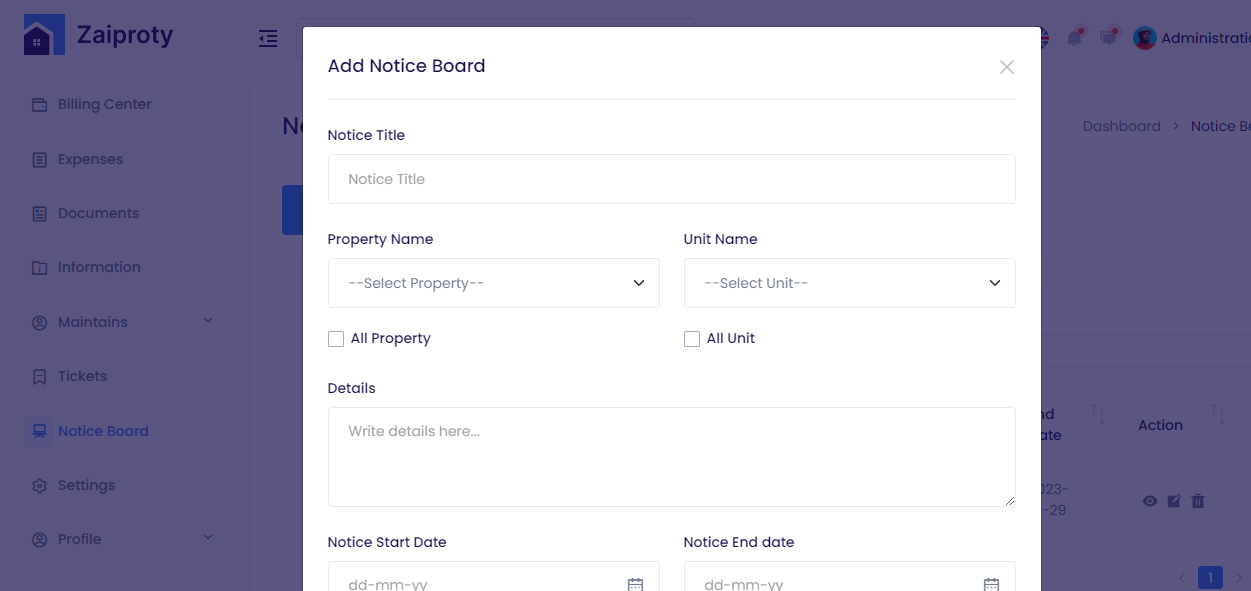
when Owner will click on Add New Notice the following modal would be opened.
Report
Earning
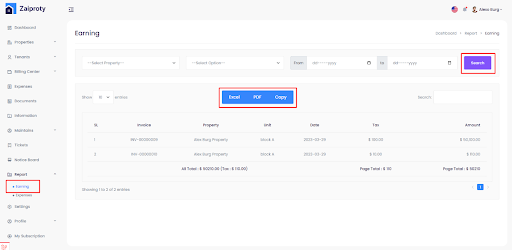
Owner can see all the earning reports from this section and can download the report.
Expenses
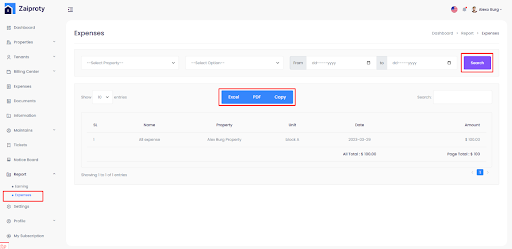
Owner can see all the expenses from this section and can download the report.
Setting
Owner Can change Setting of the website from setting section
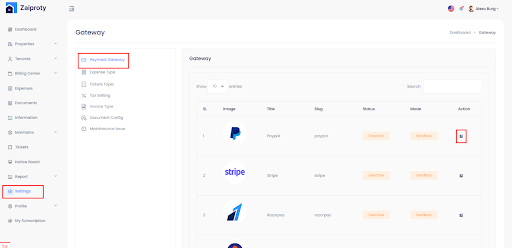
Payment Gateway
Admin can update the payment gateway from this setting.
Admin can enable / disable the payment gateway. They need to update the credentials from here.
Add the key for the desire gateway
Add the secret for the desire gateway
You can add multiple currencies from here which need to be supported by your gateway. For every currency you have to add the conversion rate.
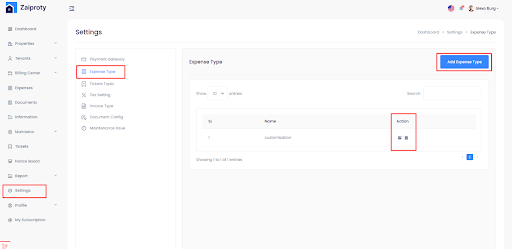
Expenses Type
Owner can add expenses type from the setting Option.
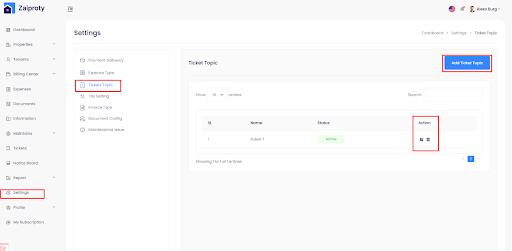
Ticket Topic
Owner can add ticket topics from the setting Option.
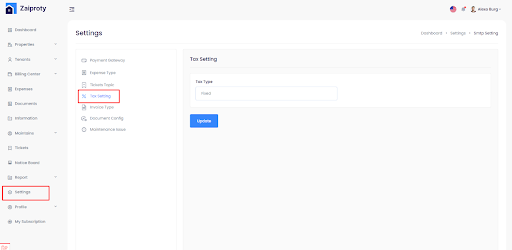
Tax Settings
Owner can set the tax type from here. (Fixed or percentage.)
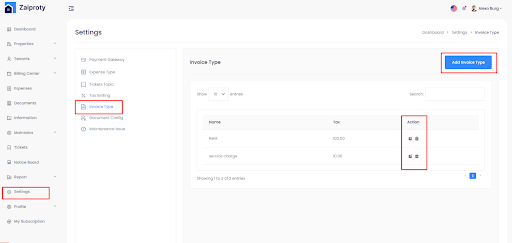
Invoice Type
Owner can add invoice type from Setting Option.
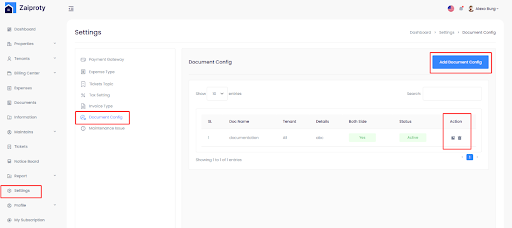
Document Config
Owner can add document config from Setting option.
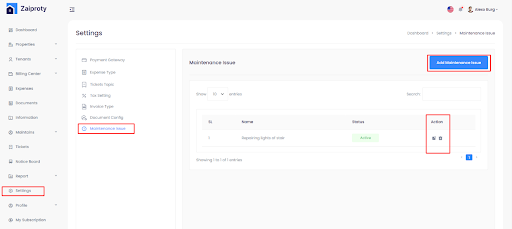
Maintenance Issue
Owner Can add Maintenance Issue from setting option.
Profile
Profile
In the Profile section, Owner can go to My profile section and change basic information about Owner's Profile.

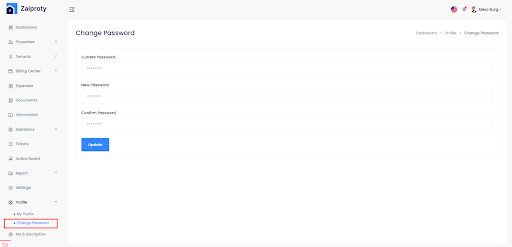
Change Password
Owner can change password of his profile from here.
My Subscription
Owner first gets a trial package given from the admin. Owner must upgrade a plan by clicking Upgrade Plan button for more access and can also cancel subscription.
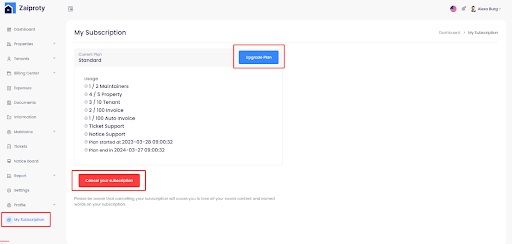
After clicking the Upgrade plan button, a modal arrives and owner can choose a package.
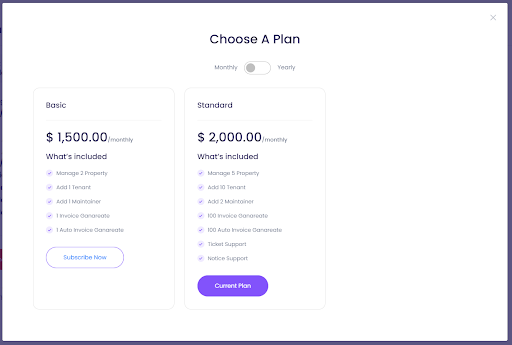
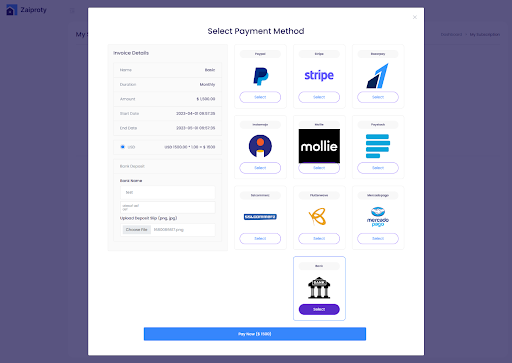
Click any Subscribe Now button. Payment section has come and chosen a payment type. Give proper information and click the pay now button. After that you have to wait for a confirmation from admin.
